


Today we’re going to look at how businesses and Freelancers can use Zoho bookings to overcome their scheduling problems and provide a hassle-free experience to customers. In this demonstration. We’ll do a walk-through of Zoho booking features. The features are best Illustrated if it’s explained in the context of a business that’s using Zoho, bookings for that. I’ve set up Zoho bookings for Imaginary business, a marketing agency called Vinika branding.
Vinika branding uses Zoho bookings to get appointments booked for the marketing consultancy services they offer at two locations in Australia and India. Vinika Branding offers three types of services in each location content auditing, content strategy, and the third one is content marketing class. The content marketing class is offered as an in-person class in India and an online class in Australia. Vinika Branding has two employees, one working from India and another from Australia Aneesh is in India, and Narmadhaa is in Australia.
Let’s log into their Zoho bookings account and see how they use Zoho bookings to organize their schedules. Once we log into the account, the first thing we see is their appointment calendar; we can see that there are three views for the calendar. One is day view, then there’s week view, and finally month view. Right now, we’re in the day view, and we can see two staff listed, Narmadhaa and Aneesh. We can see that neither Narmadhaa nor Aneesh have any appointments for the day.
Need help syncing your calendars while letting customers self-schedule and pay for appointments with Zoho Bookings?
Schedule a free consultation with our Zoho specialists!
I’ll now switch to the month view, which will give us an overview of all the appointments that are happening in the current month. We don’t have many appointments for this month on the 14th. We had two, though; let’s look at those appointment details. There were content audit appointments for Aneesh and Narmadhaa from 3:30 to 4:00 10 p.m. now. Let’s see if there are any upcoming appointments on the 29th; we have two appointments booked When we check the details, the appointments are for Content audits, one for Narmadhaa and one for Aneesh.
Next, I’ll show the week view; here, we have the two staff listed, and if we click over here, we can see how the day looks on an hourly basis. This is how the appointment schedule looks for Narmadhaa from the 18th to the 24th; let’s check how it is for Aneesh.
Workspace
A workspace is a feature for grouping people working from a common location or with a common goal. Each workspace can have settings and policies that match its goal or location. I mentioned that the agency operates from two locations, Australia and India. Therefore, it has two workspaces: Vinika branding, Australia, and Vinika branding, India.
This workspace view lists all the services from all staff and work spaces; we can select the workspace Vinika branding, Australia, to see some appointments belonging to that location.
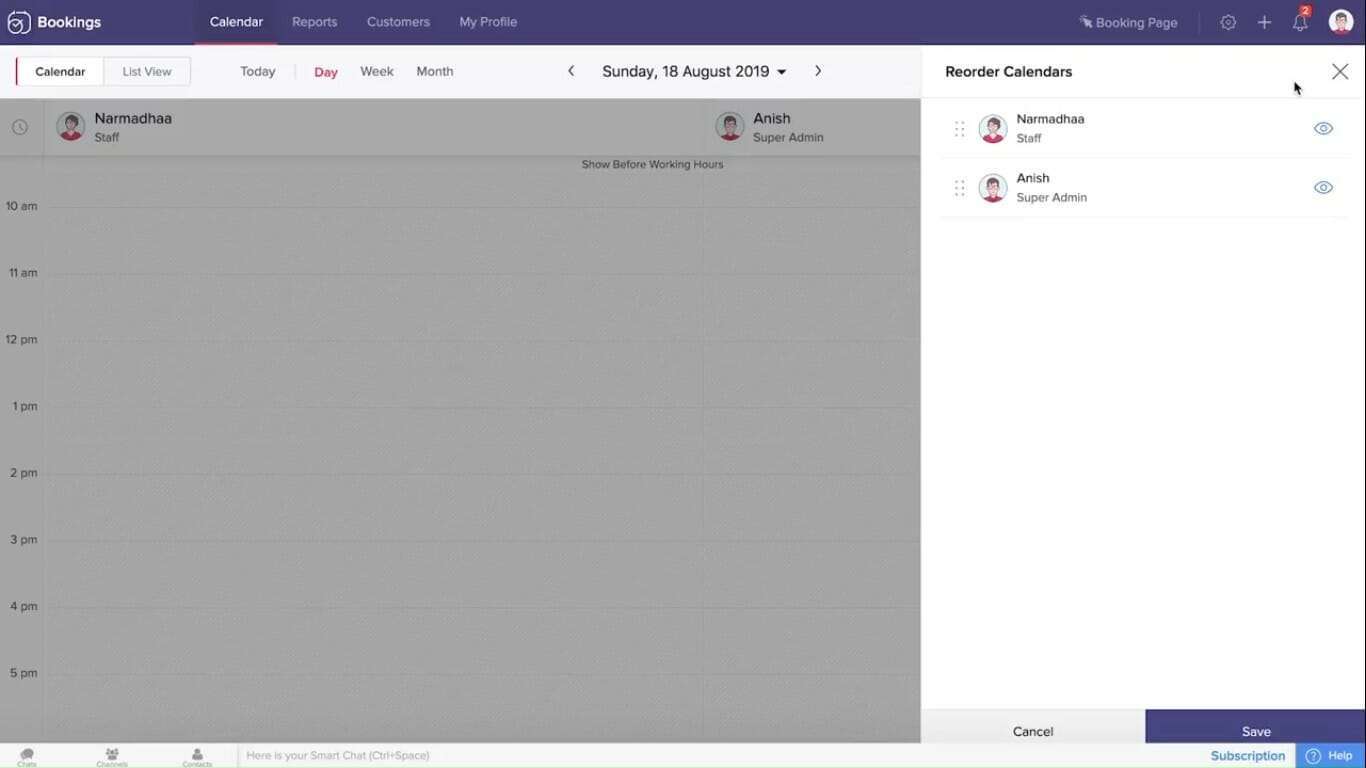
Reorder Calendars
Right now, we have only two staff members, and there is sufficient space to see their calendars assume, though, that we’ve got 20 more staff members, which would cause this space to be a little crowded. The business owner may want to see the calendars in a certain order, say alphabetical order, or, based on staff popularity, reorder calendars, allowing us to change the default order of the calendars. How about we try this feature? We can see here that Narmadhaa’s calendar is on the left and Aneesh’s calendar is on the right, but let’s switch the order. Aneesh is now on the left, and Narmadhaa calendar is on the right. We can also use this icon here to hide or show certain staff, giving a more concise look at the agency’s calendar. Next, let’s hit the settings icon here, which opens calendar interval time, choosing a higher value for the calendar interval time will help you display more appointments on your calendar, while a lower value will help you display more information about individual appointments.
We can see that it’s set to 30 minutes which splits the one-hour time interval, for example, from 10 a.m. to 11 a.m., into two 30-minute slots, and if we want to change it to five minutes, the one-hour intervals are split into Slots of five minutes. We’ll go to the day View and open the appointments on the 29th. We can see a good amount of detail about the content audit service Since we’ve chosen the calendar interval time as five minutes. Next will change from 5 minutes to 30 minutes. We can see that the information displayed about the content audit service has been reduced, but we can see more appointments on a single page.
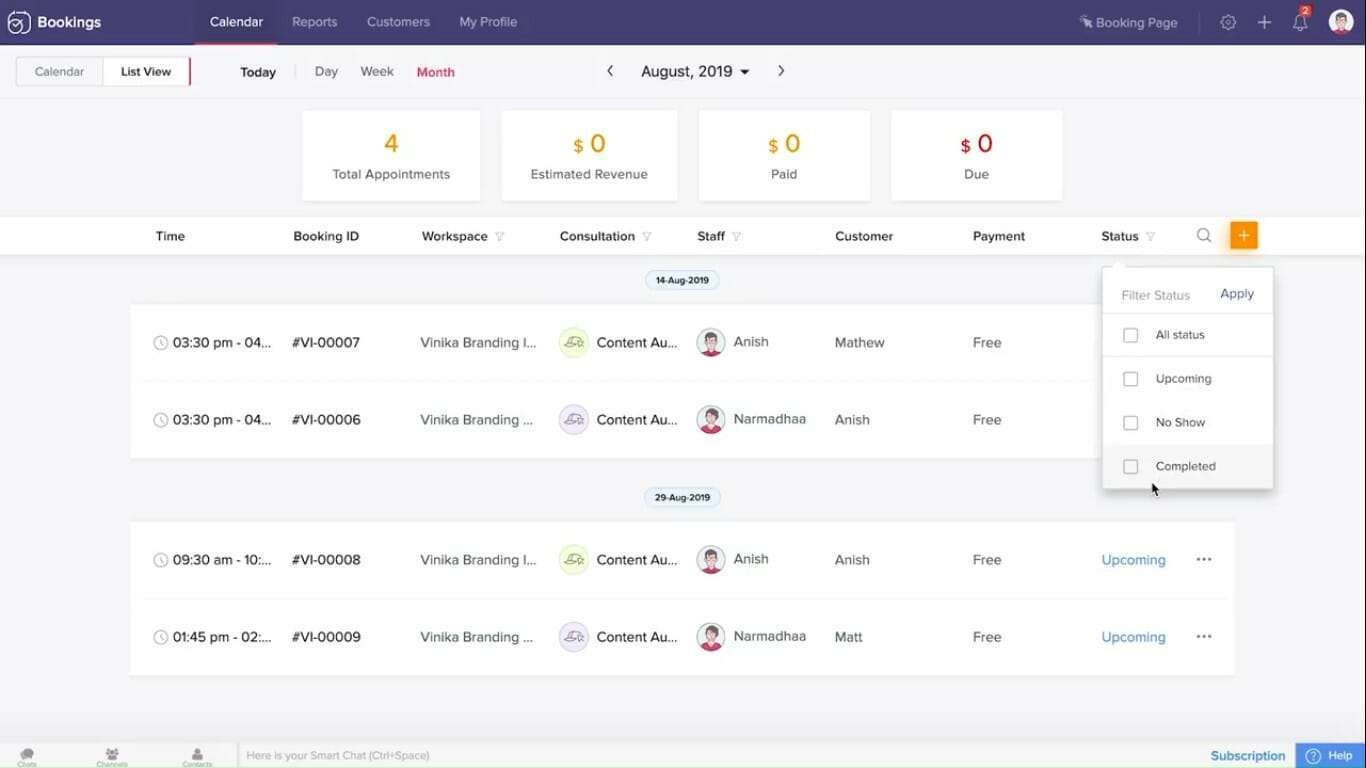
List View
By clicking today, we’ll see that there are no appointments. When we try the month view, we see that there are a total of four appointments. The beauty of list view is that we have numerous filtering and sorting options. We can experiment with filters based on statuses like upcoming and no-show. Similarly, we can apply filters for consultations to see appointments that got booked for each consultation.
Search is another option in list view; if we try searching for Aneesh, we will see all the appointments with the term Aneesh as either a customer or staff member. Next, we’ll see how to add a new appointment. Just click on this button, and a new window opens. Select the workspace service staff and time and date for the appointment, and then proceed that completes the list view.
Now I’ll return to the calendar view and show you how to add an appointment from there. If I want to add an appointment for the 22nd, I’ll click on that date, and a new window opens where I can submit the details for the appointment. One of the other things that we see on this screen is the booking page, which allows the agency’s customers to book an appointment for themselves.
Reports
This section has options to view and create reports will start by checking one of the reports created for this account, and the report shows that two bookings were made. Next, we’ll see how to create a new report. Clicking on this plus button here will open up a new window. When we move to the right side of this screen, we see two types of reports. We can create one based on bookings and another based on Revenue.
Now, let’s create a new report based on bookings. The report will show us the number of bookings Vinika branding has between their entire staff. Select the reports based on the bookings option and then select the staff member next; I’ll choose the date range as the month and then select both workspaces, the Australian and Indian branches. And then click apply; we’ve created the report showing that Aneesh and Narmadhaa have two appointments each this month, one on the 14th and another on the 29th.
We’ll name this report, appointments by staff, and click save We can share this report with other people in the agency, using the options, share with all admins and managers. There are also duplicate and delete options in reports. Numerous reports can be created depending on your requirements.