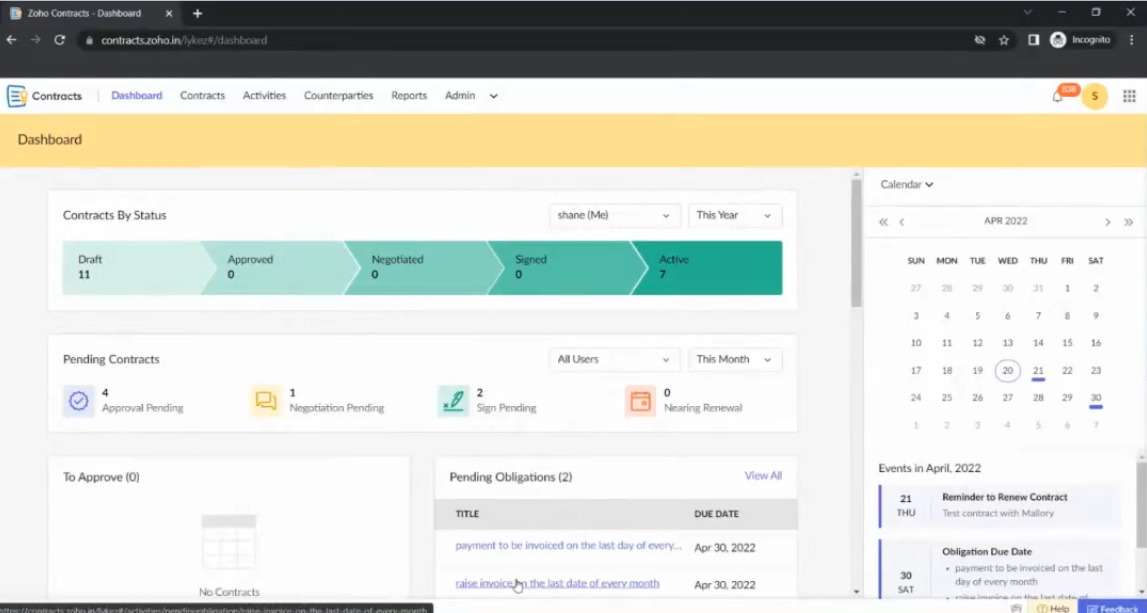
One of our customers came back to us and said that Zoho contracts drastically reduced their turnaround time from six weeks to seven weeks. It brought it down to three weeks because this has a clear-cut process of initiating a contract to the point of signing. The second effective thing that we will bring about is how you can ensure that you have contracts that are compliant and legally fail-proof. The way you build your contracts is through a predefined template. The third change that this tool can bring about in your organization is how you can improve governance through insightful reports by simply getting to know what are some of the contracts that are expiring in the next 30 days, what are some of the contracts that you’ve sent across for signing and how long has it been pending on the customer side.
Need help streamline your entire contract lifecycle and improve efficiency?
Schedule a free consultation with our Zoho Contracts specialists!

What the CLM Cycle Looks Like
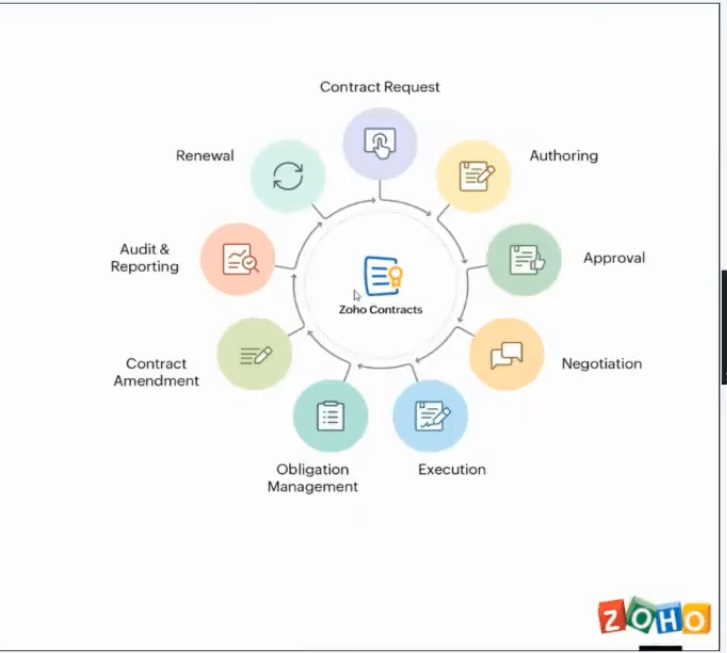
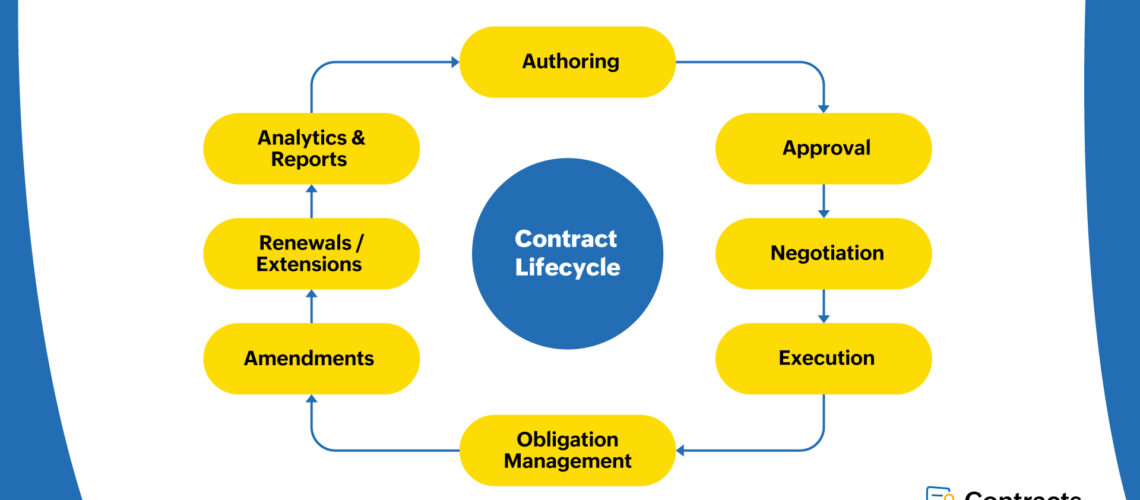
Essentially this starts at a point when somebody is going to request a contract, and the first stage is when they request a contract. How do I go about drafting my contract? How do I ensure that you know I get folks involved collaboratively and build a certain draft for a contract? So that’s the first step. The second step is, let’s say; I have a draft version of the contract. We can float that contract internally to get approved so that people have a fine print of the contract and have reviewed the contract. The third stage is now, and I have reviewed and approved the contract by all means internally; how do I go about sharing that across to my counterparty? Who is a vendor or a customer? If I share a contract with them, is there an opportunity for the customer or the vendor to negotiate the contract? If he has to negotiate, do I stay on top of the process and make sure that the negotiation happens seamlessly? At the end of the negotiation cycle, we have a contract version, which we have agreed on. Suppose I have an agreed version of the contract. In that case, we move to the last stage, the execution stage, where I get the contract signed digitally now beyond the contract being signed digitally and the contract becoming active. The contract has important dates within it. How do I ensure that I get reminders on these dates? That’s what obligation management is all about.
Then we come to a point where we have to go ahead and amend, renew, terminate or extend the contract; how do I go about handling those stages within the tool? The last feature that we will have a look at today is going to be the auditing and reporting capabilities. Some of the reports that we have is just getting to know contracts, all contracts across this tool just by their statuses or by a specific counterparty or, contracts, it’s firing in a particular period or contract that you’ve sent across in the last week but have not yet been signed.
Today we will be looking at five key features, and as we go through these five key features, we will cover an overview of this tool.
Building A Template
When you start building your templates, you can click on the new Zoho contract type, give the template a name, choose the category, choose the intent, choose party a, which would be your organization in most cases, and party b, which would be the counterparty and click on save and continue. And you pretty much get a draft template that looks like this. With every section within it empty. To show you for clarity’s sake, one of the templates that we might be using today is the master services agreement template. I’ve assembled this template, and I’m going to show you what are the different sections under this template. There will be five sections on these templates; the first section is the title section, and the second is the intro text. To add your intro text, you need to click on the edit intro text option, and you can edit the text. The third section is the lengthy section within the template. This is where you add your clauses; be cautious enough to add your clauses individually. I’ve added all my clauses one below the other individually. To add your clause, you have to click on insert clause, new clause. From your existing document, you can go ahead and copy-paste your clause and give the clause a name once you’ve added your clauses; the fourth section, right after your class section, will be the signatory block or the signatory section. This is where the signature happens; you can assign your signature block here. Beyond the signature block, we have the attachment section where you can go ahead and add your attachments. An attachment might be an appendix schedule or annexure; you can go ahead and add your appendix.

One of the things that you would have noticed across the template is the yellow highlighted text within the hashtags. So these texts are what I mentioned earlier as the fields where you get to fill in your variables; the way to add a field within any section on the template is you click on the edit section, or in our case, edit intro text and click on the button here which says insert field. Here, you would be able to spot a few system-defined fields available. You can choose one of the fields from here or click on add custom field and create your field. You need to specify what sort of information you feel needs to store, and you can go ahead and give that field a name, and you can go ahead and add your field within the text.
Once you build your templates, you’re ready to start creating contracts using this tool. To create contracts, go to the contacts module, and here you have an option that says new contract. And when you click on the new contract, you will be able to spot all the templates on the drop-down list; you can go ahead and choose the specific template and click continue. And now, when you choose a specific template, you need to mention three detailed pieces of information.
The first one is going to be the title; let’s say we’re going to create a logistics vendor contract with the DHL is the counterparty name; I need to click on add new counterparty. I have to mention DHL was to address specific information here. When I fill out the address-specific information, once you have mentioned all the information here, you can click on add, which becomes a part of the drop-down list. The third one is going to be the term and the period of the contract by large there are two types of contracts. One is what we call a definite contract; the second is an indefinite or perpetual contract. The difference is a definite contract has a clear start date and end date, and an indefinite contract has just the end date for a start. Now, when we look at a definite contract with a clear start date and an end date again for a start, we have a couple of options here. Do we want the start date to be immediately on signing the contract, that is, on execution? I’m just going to choose the start date one year from the period of activity. Now, at the end date, do I want to renew my contract and if I want to renew my contract, do I want a renewal reminder from the tool? And how many days before would I want a renewal reminder from the contract? 30 days, once I click on save and continue.
So, a draft version of the Zoho contract will be created, and as you can see, most of those yellow fields, or all of these yellow fields, have transformed into blue fields, where I have to fill out the customer-specific information.


