1. Install & activate Integration of WooCommerce with ZOHO Inventory.
2. Click the Home button.
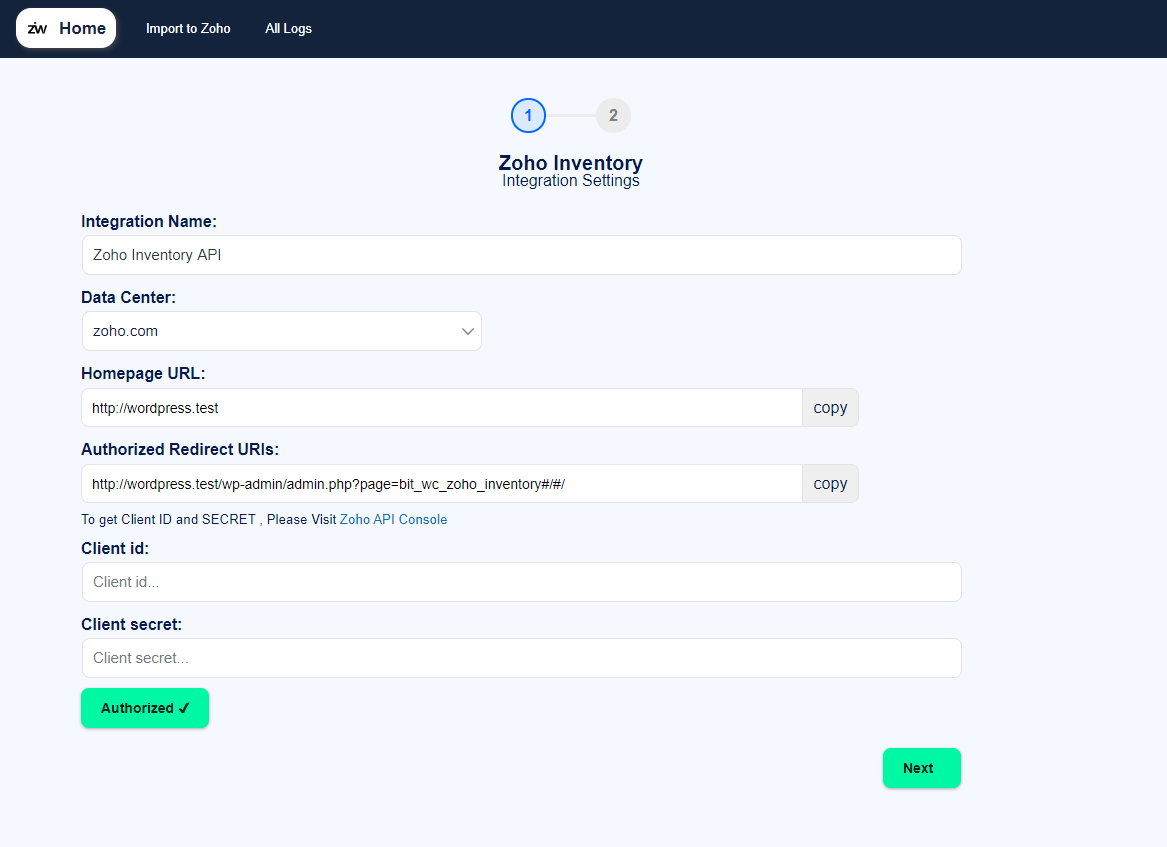
3. From Zoho Inventory settings enter Integration Name, Data Center, Homepage URL, Authorized Redirect URL.
4. To get client Id & secret information go to ZOHO API CONSOLE => Add Client=> Server-based application => Create New Client. Register all the information and get your client ID and secret information.
5. Authorize your site.
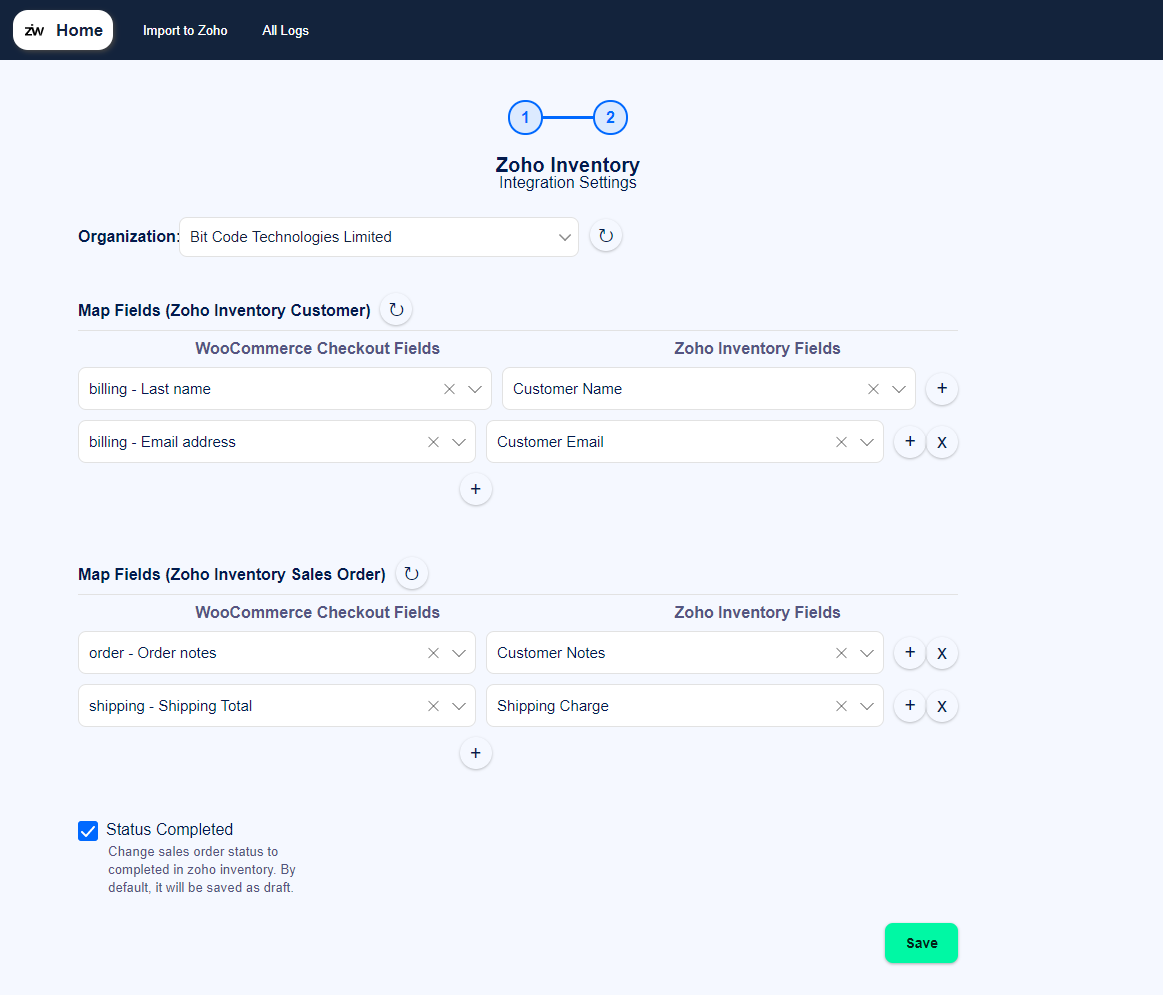
Mapping Setting:
For mapping, the fields, first enter your ‘organization name‘ to which your Zoho account belongs. Now you can sync order details of your site with Zoho inventory by mapping the fields regarding your choice. You just have to map those fields only once, after that it will be executed by the plugin automatically.
Map fields for Zoho Inventory Customers:
Suppose you want to set your customer’s first name as a contact name in Zoho inventory. Then select ‘First Name‘ in your wooCommerce checkout field & select ‘Contact Name‘ in the Zoho inventory field. You can map multiple fields with inventory fields to organize your customer information.
You can set ‘Custom value‘ from where you can send order notes according to the placed order.
[1. By default, Zoho inventory has settings not to allow the same name for contacts. But to work with this plugin more precisely, you have to turn on that setting from the Zoho inventory. ]
[2. If you don't want your customers to get duplicated in Zoho inventory, you must map the customer email field. So every time an order has been processed, at first, the plugin will check if the customer with that email already exists in Zoho inventory; if it exists, then it gets referenced to that customer; otherwise, the customer will be considered as a new one. ]
Map fields for Zoho Inventory Sales Order:
When customers place an order from your wooCommerce site a corresponding sales order is created automatically expect the ‘Shipping Charge‘ field. The automated fields are Items & Description, Order ID, Status, Rate, Discount, & Amount. You can customize your sales order area according to your need that how you want to show your customer’s sales order on your Zoho inventory account.
Actions:
After mapping all your required fields select the necessary action “Status Completed” to make the order status complete, and then click on the Save button to save your settings.
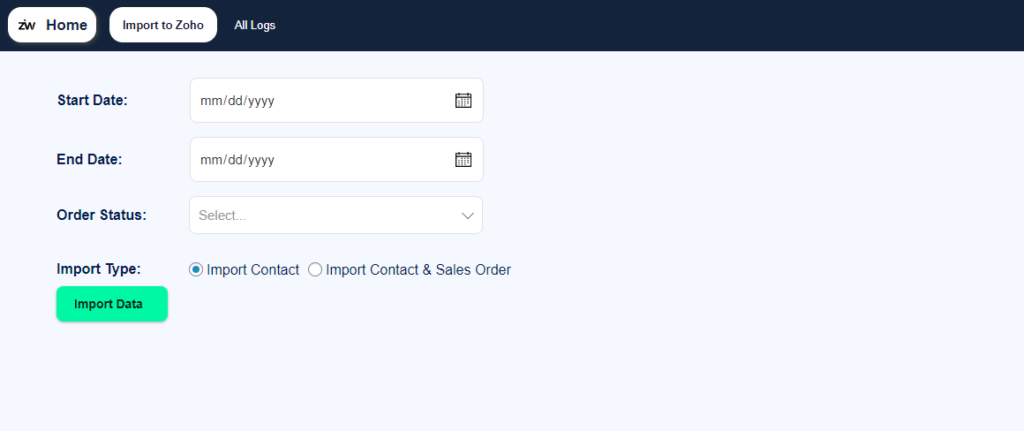
Import to Zoho Setting
In this area, you can set the duration, within which date you can import all data to inventory. For example, you are running a wooCoomerce site since 2019 but you have been using this plugin since 2020. Then if you set Start Date – 1/01/19, End Date – 1/01/2020, Order Status – Confirmed & also set Import Type, after clicking ‘Import Data‘ only mentioned data will be imported to Zoho inventory. If you want to import all the confirmed data between 2019 to 2021 then just click the ‘Import Data’ button. You can select multiple order status to import orders.
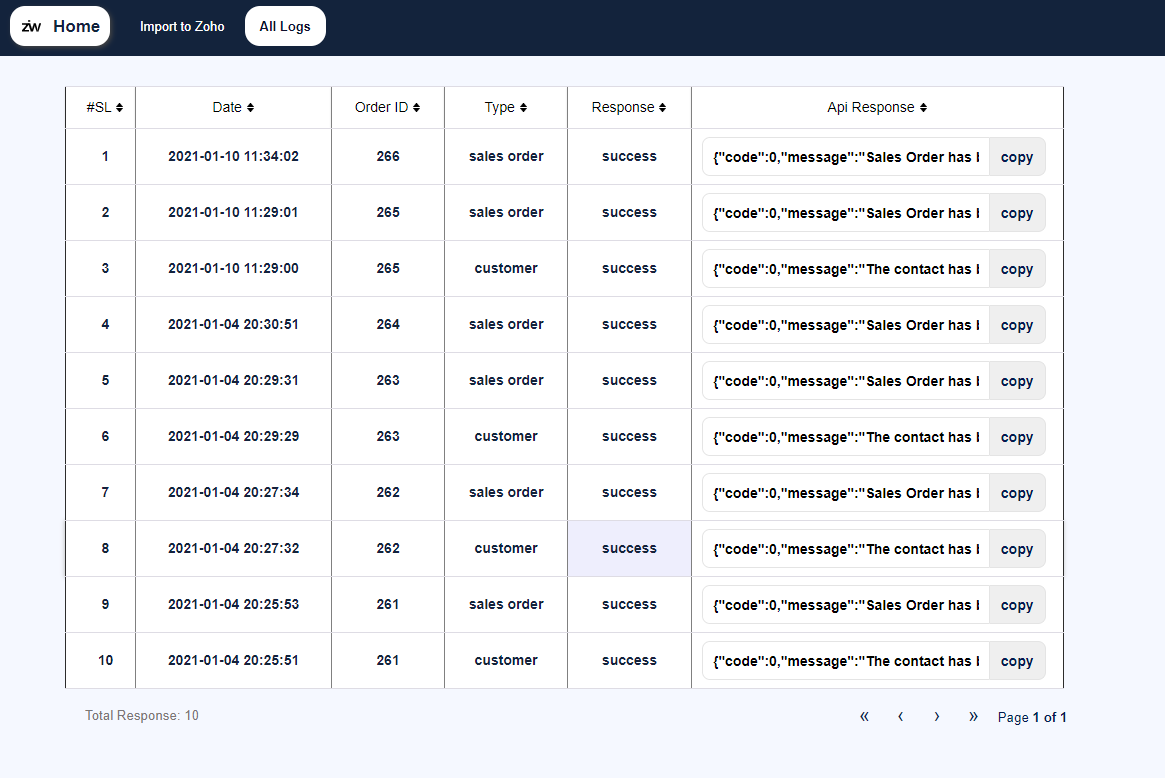
All Logs
All logs allow admin to see the newly created data which has been placed on the site.
If user import any old data from your site, these data will also be displayed here.
Users can sort the columns according to their preference.
Users can copy all the API response of sales order to clipboard.