


What is Zoho sheet
Zoho sheet is the default spreadsheet processor for Zoho docs, an online document management system. Zoho sheet is a cloud-based application that lets you create, edit and share spreadsheets from your internet browser. Though it’s in a web-based application, Zoho sheet is incredibly powerful and can be used to work with a large amount of data, functions from Euler’s charts, etc.
It is a great online productivity application, which businesses find extremely useful for collaboration; what do I have for you? From today’s demonstration, you will learn how the whole sheet can be used for collaborating on spreadsheets and real-time automating workflows using formulas and macros protecting your data by locking sales and ranges, how to control using data validation, how to get a detail inside on user activities, using audit trail, and many other functions.
Need help to easily collaborate with your colleagues online, speeding up and improving job efficiency with Zoho Sheet?
Schedule a free consultation with our Zoho specialists!!
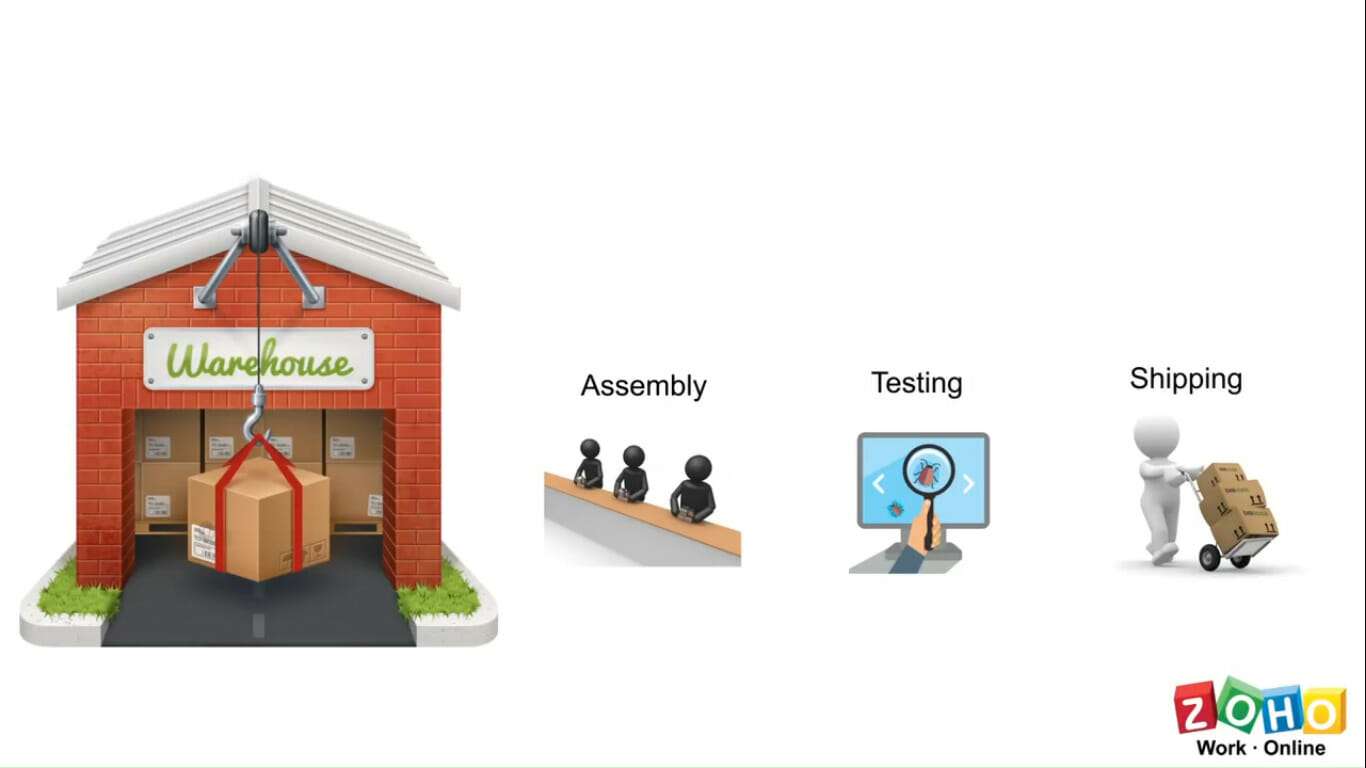
In today’s demo, we’re going to be using this imaginary warehouse as our use case, and we’re going to be building our spreadsheet based on the requirements of this warehouse. And we’re using this warehouse scenario as the use case because this will help us understand how the features in Zoho sheet can be used in real-life business situations.
Let’s call this warehouse ABC limited, so what ABC limited does is they store bicycles for a bicycle manufacturer. When an order is placed on the manufacturer’s website by a bicycle dealer or a retailer, the website or the manufacturer will forward the order details to our warehouse.
The warehouse will then process and ship the ordered items to the dealers and retailers. Now, the place where our spreadsheet will be implemented is within this warehouse, and within the warehouse, we have three different teams the assembly team, the testing team, and the shipping team. A manager heads these three teams, and the manager is the one who will receive the order details from the company website. And the current workflow followed in processing these orders goes like this, the manager will first forward the order details to the assembly department, where the bicycle will be assembled. Then the items will be moved to the testing department, where they will be tested. The tested items will then be moved to the shipping department, where they will be shipped to the dealers and the retailers who placed the order. The order details must go from the manager to each department step by step.
And to do this, our teams here are using emails to communicate the order details, and multiple spreadsheets are used to keep track of these orders. Hence, their process is currently time-consuming and even confusing. We’re going to help them out by building a perfect collaboration platform from the Zoho sheet in which they can carry out their entire process seamlessly.
First, I’m going to log into my Zoho docs account to create a new spreadsheet; to create a new Zoho sheet, I go to the create button at the top and select spreadsheet, and Zoho docs will create the new spreadsheet in a new tab. Let’s call this spreadsheet new order details; I have some ideas on how this spreadsheet needs to be set up to accomplish what we’re trying to do here. And my plan here is to create separate sheets for each department within this spreadsheet. Each team will have its sheet from which it can get the data they want, and since these separate sheets will be created inside this single spreadsheet, it will be easy for us to link the data from one sheet to another.
Creating New Sheets
Let’s start with creating these new sheets first, and we have a total of three departments here headed by one manager. And I’m going to pretend like the manager here, so we’ll build the spreadsheets for the team. We have to create four separate sheets, one for me and three for the teams to create new sheets within the spreadsheet. I should click this little plus icon at the bottom of the spreadsheet. The new sheets will be created within the default spreadsheet. They will be named sheets 1, 2, 3 & 4; to rename this, we should right-click the sheet and hit rename.
Let’s call the first sheet order details, which the manager will use, and call this second assembly, which the assembly department will use, and let’s name the third one for testing and the last one for the shipping department. We have separate sheets for each department; let’s start with the order details sheet. The manager will use this sheet for storing and managing order details. This will be like the main sheet from where the data will be moved around. Let’s go ahead and format this so that it will be easy for the manager to store and maintain your details.
Before we do that, let me first bring in some sample orders so we will have an idea of what the order details will look like and what the data will contain so that we can format the sheet accordingly. The manager gets the following details for every order: the dealer’s name, who placed it, the order, and the date on which the order was placed—the model name of the product, along with the quantity. In addition, the manager will also generate a unique order number for each order; to keep track of each other internally, we have to add an extra column for the order number.
We have separate columns created for each piece of information now; let’s add some colors to give it a polished look so the data will be easily read. And I will use the format painter to format the colors quickly. Let’s make some space for the company name at the top and align this text a little bit, and I can even add the company’s logo if I want by going to the insert tab at the top and clicking the image.
Let’s go ahead and format some of the text and some of the columns to change the appearance of the data to bring some uniformity. Let’s start with the order dates; here, in this column, the order dates will be entered and saved, and it will be easy for us to read if the date is shown in the month date year format. To format the cells, I should first select them to do a right click and select format cells, and the format cell box will come up. I should choose the category as date and time and select the format I want, and we’ll get a preview of how the text will look down here in the format box. To apply it, I should click ok, and the text will be formatted. And now, as you can see, the dates are easy to read. Great. Now, let’s move on to the model column, so we have a column in which the bicycle model from the order will be mentioned. So apparently, this column should contain only the model number from the order and nothing else. What we’re going to do here is we’re going to restrict the data entered in this column to the model names only, in addition to that. I’m also going to help the user enter the correct data model names by providing a drop-down menu with the actual model names. I’m going to use this functionality called data validation to do that.
Data Validation
Data validation allows us to define certain restrictions to a cell, and it will validate the data entered into the cell based on the restrictions we have defined. It will accept the entered data only when it falls into the defined rules. Let me show you how this works. To enable data validation, we should first select the area which needs to be validated and go to the data tab at the top and click data validation. The data validation dialog box will come up, and here’s where we configure the data validation for the selected column. First, we should ensure that the proper range is selected to which the validation will be applied. And next, in the criteria section, we should define what needs to be validated and how in our case, we need only certain text to be allowed, and we’re going to provide the list of text that should be allowed, which are the model names in our case.